
Teardrop: Doors, Floors and Fenders
Heartened and excited by the test drive, I was not anxious to take it on a longer drive and get it weighed. Weight had been an ongoing worry and something that I planned for at every step and decision that had to be made.
Access Panel and Trim
I finished the wiring access panel, fitted butyl to it to keep it dry and screwed it in place.
The trim was something that I’d been looking forward to. To me it gave the teardrop a more, finished and refined look. And… it was relatively simple work. The only problem was that I knew there were holes in places that I couldn’t hide and needed to be filled. At the time, I didn’t know what I was goig to use. I’d considered liquid aluminium, but that didn’t exist any more.
Then I remembered Epoxy-Stik. This stuff was sandable, sticky, and almost aluminium coloured. I marked all the holes that were going to be covered by the trim so that I didn’t drill into the same hole, and filled them with this stuff. It worked perfectly.
Next, the trim when on, first bending it, drilling it to give it some memory, then remove it, adding silicone caulking and reinstalling it to be on the safe side. Worked great.
When I got back to the hatch, I filled all the holes and screwed the aluminium to the frames, again using butyl where the sheets overlapped. If you’ll recall, there was nothing to screw the trim into, so I purchased some nickel plated leather rivets and, using a pair of vice grips covered with scrap aluminium to prevent scratching, use them to set the rivets through the trim and sheeting. Worked perfectly and when the hatch is closed, the 1/8″ lip on the trim covers the small gap between the sheeting and the wall.
To finish the hatch off, I installed the lock bars and using a trick from Camp and Camera — a YouTube Teardrop builder that I used many of his ideas — drilled holes in the side walls for the rods and reinforced it with countersunk, steel washers.
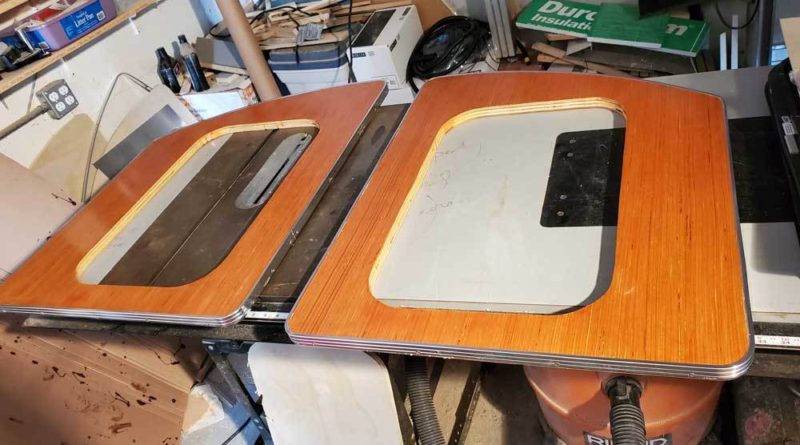
The Doors
The doors I’d pondered over for quit some time. I’m a bit fan of templates, but I didn’t have a template for the doors. All I had was the template I used to cut the door frames. I reasoned that the door, with the trim added to the frame and the door itself, needed about 1/16″ clearance. The trim added about 1/8″ therefore, if I cut a door using a 1/4″ router bit, it should be just about perfect in size, maybe a little larger than expected, but still a better solution then trying to hand cut a template. But finding a 1/4″ router bit on a 1/2″ shank is impossible. What to do?
I discovered, thanks to Amazon, that there was a 1/2″ to 1/4″ reducing chuck for a router so bought the chuck, and 1/4″ router bit on a 1/4″ shank. Chucking it out, it worked perfectly and my doors were an EXACT fit to the frame at exactly 1/4″ smaller in size.
Cutting the holes for the windows, attaching the trim, laminating the interior wood and then routering the opening for the window was a breeze.
for the exterior aluminium, I created a template that was 3/4″ bigger than the door. This would help to act as a seal, since I’d apply a gasket to it and it would seal to the wall when closed. Eventually, I’ll add an internal frame as well, both for looks and to put another gasket.
Once completed and installed, it looks great and fit perfectly. So perfect that the doors needed to be pushed forward an amount that I couldn’t detect to close all the way. You can see the finished result in the pics.
The Floor
Installing the hardwood floor, this stuff is incredibly resilient to scratches and you can buy it from 20 bucks a package to 100 bucks a package. I needed two packages to floor the interior and opted for a foam subfloor as well. I’m not sure it was necessary, but I thought any foam will help to insulate. It’s not screwed or nailed down anywhere, instead, using the interlocking of the panels and quarter round around the edges screwed into the walls. That way if I need to replace it or something happens to it, it’s a few screws and I’m good to go.
Initially I wanted a light colour, like maple or birch to match the cabinetry, but apparently, the favourite ‘colour’ this year is grey. How boring. Hopefully natural colour wood will come back into fashion and I can replace it with something that has a nicer feel to it. But I suppose it’s going to be covered with the mattress anyway.
Fenders
The fenders that came with the trailer were huge iron monsters weighing about 25 lbs each. Not only ugly, but heavy and ugly. Again, Amazon had these fenders, plastic, total weight about 5 lbs. They were cheap and will do the job until I can either find better fenders or build my own out of fibreglass. Painted with silver and wired for the side-markers, installation was through the access panel accessible in the cabin interior.
In the final shots you can see them installed and lit up.


